Thursday, July 29, 2010

My Little Mjolnir

It's very hard to find a small Mjolnir. Being a representation of the thunder god's most cherished weapon tends to not lend itself to descriptions such as 'small' or 'delicate'.


The early Mjolnir pendants, such as this one discovered in Denmark, were often times made of stone or iron, and ranged from intricately detailed works of art to rough, simple almost abstract shapes. They were first worn as protective talismans, but soon also became defiant symbols of faith as Christianity spread into the Germanic lands. Today they can be found recreated as nearly identical reproductions of the ancient pendants, or with entirely new designs and engravings. But on the whole they are still rather large and clunky. Which is why I was elated when my fiance found me this one at the Ren Faire in San Francisco years ago.


It was most certainly delicate, though not terribly small, measuring about 1.5" by 1". When it comes to the jewelry I wear on a daily basis, I like tiny things on small chains. Light and airy things. And though I love this Mjolnir, it is sometimes a bit much for every single day.
Last weekend, me and my fiance were poking around The Lucky Monkey gift shop in Bellingham, looking for a birthday card for my best friends daughter. And there it was. Back in the shadowy pagan corner. The tiniest Mjolnir ever.


Eeep! It is so small. I just had to have it. Funds have been low lately, and it was smack dab in the middle of the sterling silver jewelry tray. I dreaded the response, and almost couldn't bring myself to ask the fateful words 'How much?'. My jaw nearly hit the floor when the sweet heart behind the counter said six bucks. Six bucks. For a sterling silver Mjolnir. My birthday is next month, so I told Morgan he would have to come back and pick it up for me. He gently responded screw that, we're getting it now. Eeee!


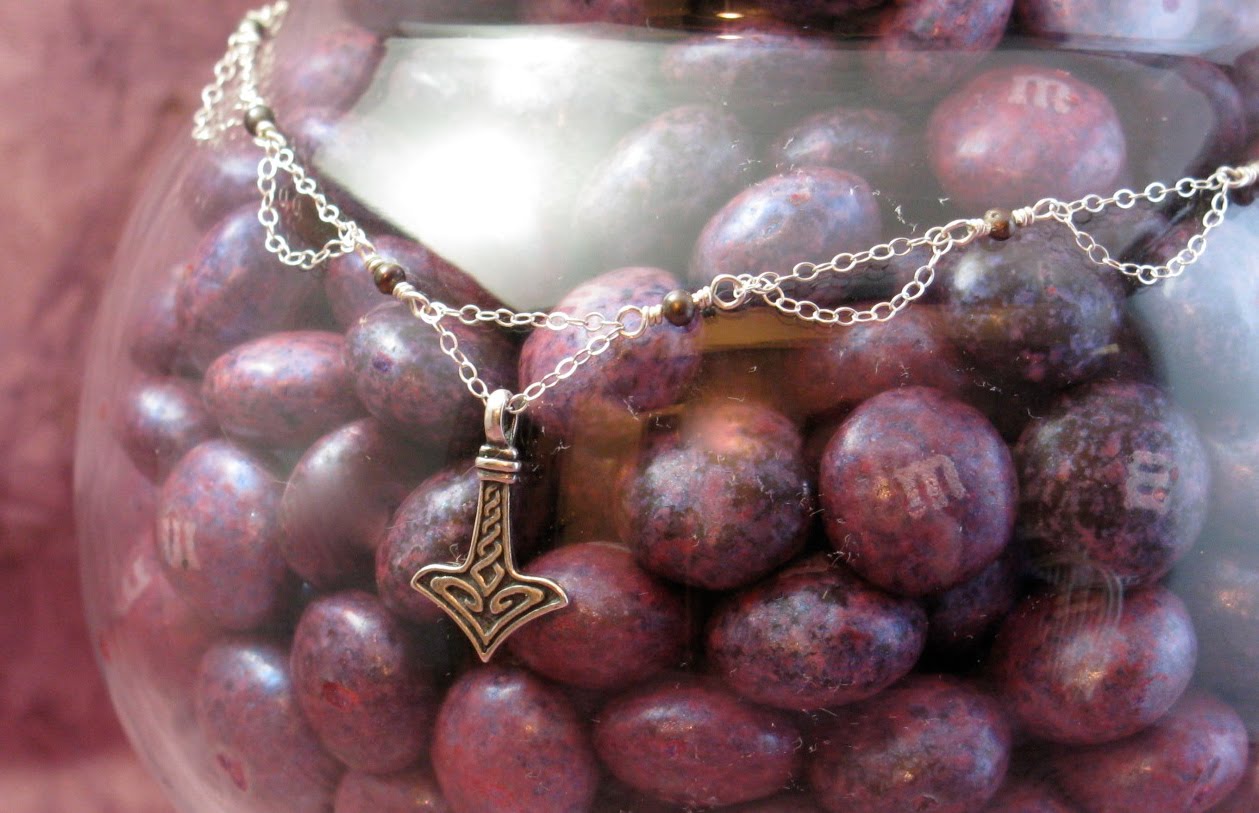
So now I have the tiniest of tiny Mjolnirs. It is darn near dwarfed by my original one. I couldn't wait to get home and make a chain for it. I strung it up with sterling and fresh water pearls, and it is just perfect.


Visit my shop at etsy.

Tuesday, July 6, 2010

The Sun Is Finally Out

... and boy are the kitties happy. It's been cloudy and overcast for quite a while here in my wonderfully soggy Washington, but the sun came out today and was greeted by fluffy cats flumping in every sun beam they could find.


This is Nick. She is a big fuzzy lump of Norwegian Forrest cat. I have never had a cat that took flopping so seriously. She excels at the sport. Ninety percent of the time you will find her cradled in pillows and piles of blankets. And she does it in such a way that she can fall asleep on her back, front paws hovering over her chest and back paws akimbo. The goddess Freya, when not riding her boar, rides in a chariot drawn by cats. Some think that it was in fact the Norwegian Forest cat that was up to this task. If so she wouldn't have gotten very far with Nick.


Bagheera, the big black Indian Fishing cat mixed with Siamese, and Frank, the Birman, prefer more dignified sniggling.

Visit my shop at etsy.

Monday, June 28, 2010

Yay! Owl Vomit!

My dear, dear mother who knows me way too well, sent me the most amazing gift the other day. Owl pellets! Owl pellets are the regurgitated undigestible parts of an owl's breakfast, lunch, or dinner. And if you are fortunate enough to have a friend with a family of owls roosting in your yard, they are quite easily acquired. And if you are unfortunate enough to have me for a daughter you may find yourself in your friends yard pawing through the grass and picking owl puke. Thanks mom!


I forgot to snap some photo's before I started the macerating process, so here are some generic pics of owl pellets if you have never seen them before. They are small, dry lumps of matted fur and various goodies. Kind of like a cat's hair ball but with tiny bones in it!
I tried to macerate a dead bird I found in my yard by soaking it in bleach, only to find that the bleach destroys both the flesh and the bone. So this time, after doing a little research online, I decided to go with cold water maceration. You just drop the pellets in a jar of water, make sure the lid is on tight ( I cannot over state that part) and put it in a warm location. Mine ended up residing in the sunny windowsill of my living room. Soon I had a thick, greenish brown slurry of rotting flesh, fur, twigs and bones. Again, I'm sorry, I forgot to pull out my camera. And as long as your lid is on tight, the joy of smelling said concoction can wait till it's time to separate out the bones from the gunk. Mine sat for three days.


Yes, I do have a camera! So here we are, most of the way through the treasure hunt when I finally realize I should be taking some pictures. I made a strainer out of some window screen and part of a box. I then got the unique and unenviable experience of opening a jar of rotting mice that has sat in the sun for half a week. The nearly visible wave of stench that hit me made me want to drop to my knees and thank the gods for small favors like my severe allergies and near constant sinus congestion. The flesh and bone milkshake was poured into the strainer and rinsed thoroughly to remove most of the unwanted bits. I then went through with tweezers and removed all the bone from the remaining matted clots of hair. This was a painstaking, tedious and aromatic endeavor.


Back in the jar they went, skulls, ribs, femurs, teeth. It was like being on the set of the Texas Dollhouse Chainsaw Massacre. They will now spend a few more days lounging in the sun while the remaining bits of unwanted flesh decompose.


I will return when they have finished macerating.


Visit my shop at etsy.

Wednesday, June 2, 2010

Koke Pendant


My mom has a beautiful little Meyers parrot named Koke. He's an adorable little mimic with beautiful plumage that ranges in color from dark grey and aquamarine to vibrant yellow and teal. She has been collecting his discarded feathers for a while now, and has sent boxes and boxes of the lovely downy quills to me.


I'd been pondering just what to do with these little treasures, when my mom asked if I would make her a pendant box with his feathers. Brilliant! I've been at work trimming, shaping, and curling the little buggers, trying to make an arrangement inside of a tiny box.


I have to say this has become one of my favorite boxes. The photo's just do not do it justice. I usually use lightly tinted book pages as backgrounds, but the delicate feathers were lost against the print on the paper. I ended up putting a wash of rich black gesso over the paper, which made the vibrant greens and blues of the feathers pop. Darkening the back ground gave it a dramatic, elegant feel. Combined with sparkling silver watch parts and twinkling rhinestones, it brings to mind a fan of peacock plumes a victorian heiress might have brought to a gala masquerade ball.


Koke's name is formed on the back with clipped print, and underlined by one of his bright yellow feathers, trimmed to perfection.


The necklace is finished off with sterling silver chain and wire wrapped deep blue peacock pearls. I'll be sorry to see this one go!


Visit my shop at etsy.

Sunday, May 16, 2010

The fun of storage

I love storage. The only thing better than organizing all your bits and pieces into perfectly sized containers is obtaining the bits and pieces themselves. And having beautiful containers that look lovely on display.
A while back I bought up a whole slew of little craft paper boxes in various shapes and sizes. They were nesting boxes, ranging in size from about 1" across to 2" across, and came in square and hexagonal. They had been clearanced down to just pennies a box, and I couldn't pass them up, even though I had no clue what I was going to do with them. After playing around with them for a while, I came up with a wonderful use. I now have cute little shelves made of 2" L shaped molding full of my little treasures and supplies on display.


Here's how:

Remove the lids from the boxes, and trace a cutting line on the top of the lid apx 1/8 -1/4" away from the outer edge. Use an X-acto knife to cut along your line and remove the 'window' from the lid of your box.
Now you need a sturdy piece of clear plastic sheeting to use as your window pane, and the plastic packaging that comes with the everyday odds and ends you buy is perfect. You know the plastic packaging that comes on on darn near every little electronic gizmo you buy? That annoying wrapper with the melted together seams that you just about need a cutting torch and machete to get open? Well that stuff is perfect! And it can be found on many other items as well. It's crystal clear, with a good sturdy thickness. It took me a bit of scrounging through my boxes and closets, but I eventually found enough of it to make all the panes I needed.


Use the 'window' you already cut out of your lids as a template. You are going to want to cut your panes larger than the template, but small enough to fit into the inside your your box lids. Once you have those cut, use a simple white craft tacky glue to glue them into your box lids. Remember people, your plastic pane goes inside the lid. Set them aside to dry completely.
Now you are going to glaze your panes. This will add stability, and seems to increase the transparency of the plastic. I used Inkssentials Crackle Accent, but any thick 3 dimensional glossy medium should work. If you use the Crackle Accent like I did, it will not crackle and craze throughout the whole surface due to the properties of the plastic surface beneath it. But it will crackle along the edges of your pane where it touches the craft box, creating a frosty edged - winter window look that is very fun. Whatever you choose to use, be sure and remove any bubbles by dragging them to the surface with a pin, and allow to dry completely.
I chose to paint the inside of my boxes. I used black for a more dramatic look, but you could use white to keep things lighter, or use a color that coordinates with the room they will be in.
After filling them, I use little black rubber bands to keep them closed should they get knocked off the shelf by a frisky cat.


I now have lovely little shelves full of little curiosities begging people to take a peek inside. And you will find everything from assorted ball bearings and the cast off shells of robin's eggs, to insect husks and gem stones. So please enjoy, and leave me a comment if anything is lacking in my instructions.


Visit my shop at etsy.

Monday, February 22, 2010

1" Curiosities


I've been putting together some one inch by one inch shadow box pendants, and they've turned out really cute.


Collages of hand painted and stained book pages and individually antiqued letter tiles, studded with watch gears and little mechanical parts. Some are frosted with tiny rhinestones, and one even has tiny princess cut topaz loosely tumbling around inside with small blue metallic orbs. A touch of heart shaped confetti and some clipped type finish off another box. They have been way too much fun to make.


I've got some sterling chain and wire on the way, and soon my little boxes will be combined with pearls and crystals to make finished necklaces. I can't wait! I've promised a friend of mine she and her coworkers will have first pick of them, and the rest will be split between etsy and the gallery.


Visit my shop at etsy.

Thursday, February 18, 2010

Empty Shelves and Possibilites

I was invited last week to put some of my treasures in the Art and Soul Gallery in Bothell Washington. It's part of the uber quaint little Country Village So I packed up a basket full of trinkets and brought them down. Problem is, now my etsy shop is almost bare. I took down my newest box, so I'll just have to show some pics of it here.


I'm trying to whip up some little 1" shadow box pendants to fill my shelves again.


It's slow going. The surface of the paper I'm using to construct them is glossy, so I'm having a heck of a time keeping them glued in place till I can solder them. Oh well, they should turn out pretty cute. Now, what to fill them with?


Visit my shop at etsy.

Tuesday, February 16, 2010

Help with photos

I'm creating this post to get some help with photos. I'm trying to photograph glass boxes with decorative interiors. I've constructed a light box, with an above light, and a light on each side, all otlites.


Here is how the pics are turning out. Very dark interiors, with glare from all other light sources.


Here is a shot with also using the flash on my camera. You can finally see inside the box, bit it's vary harsh.


Visit my shop at etsy.

Wednesday, February 10, 2010

Yggdrasill

I'm working on a new box, and it seems it's just too darn small. I really didn't think this one out.
There's no way I'm fitting Asgardhr, Ljossalfheimr, Niflheimr, Jotunheimr, Svartalheimr, Muspellsheimr, Vanaheimer, Midhgardhr and Hel into a little 2" x 3" box. Not to mention all the wells, or the stags in it's branches, or the snakes in Hvergelmir.


Here is my wire Yddgrasill, in a little box with a water colored landscape behind.
I think I'm gonna have to set this box aside and work on a larger one. Oh this is gonna be a project.


Visit my shop at etsy.

Monday, February 8, 2010

New Banner

Just whipped up a new banner for my shop, the old one wasn't cutting it.


Visit my shop at etsy.

Sunday, February 7, 2010

Slowly but surely

Oh how cool! I'm still figuring out all the neat little things to do on etsy.com, and today I visited the Storque Blog page. I was blown away when I saw one of my pieces on the front page. Too cool! You can check out the article here


Visit my shop at etsy.

Sunday, December 27, 2009

Yuletime!

I hope everyone had a splendid Yule. My mom sent me this amazing tree, a tall growth of spiraling black metal, very chic! And as this is the first year I've lived somewhere I actually had room for such a thing, she sent me boxes and boxes of splendid trinkets to suspend from it.


I've also been busy with more boxes. One a creamy collage of wax and paper and little metal treasures.


Another one that is a spunky use of some very strange shell parts that have been teasing me to use them in something for years.


And another encapsulating a grape vine beetle, Pelidnota Punctata.


I hope to have them up on Etsy sometime Monday.

Visit my shop at etsy.

Thursday, December 3, 2009

It's cold out there!

Brrrr! We've been waking up lately to a lovely coating of shimmering frost everywhere.


I finally finished a few of my boxes and got them put up on Etsy. They look very cute, and in one day have gotten more hits then any of my ornaments have in the weeks that they have been up.


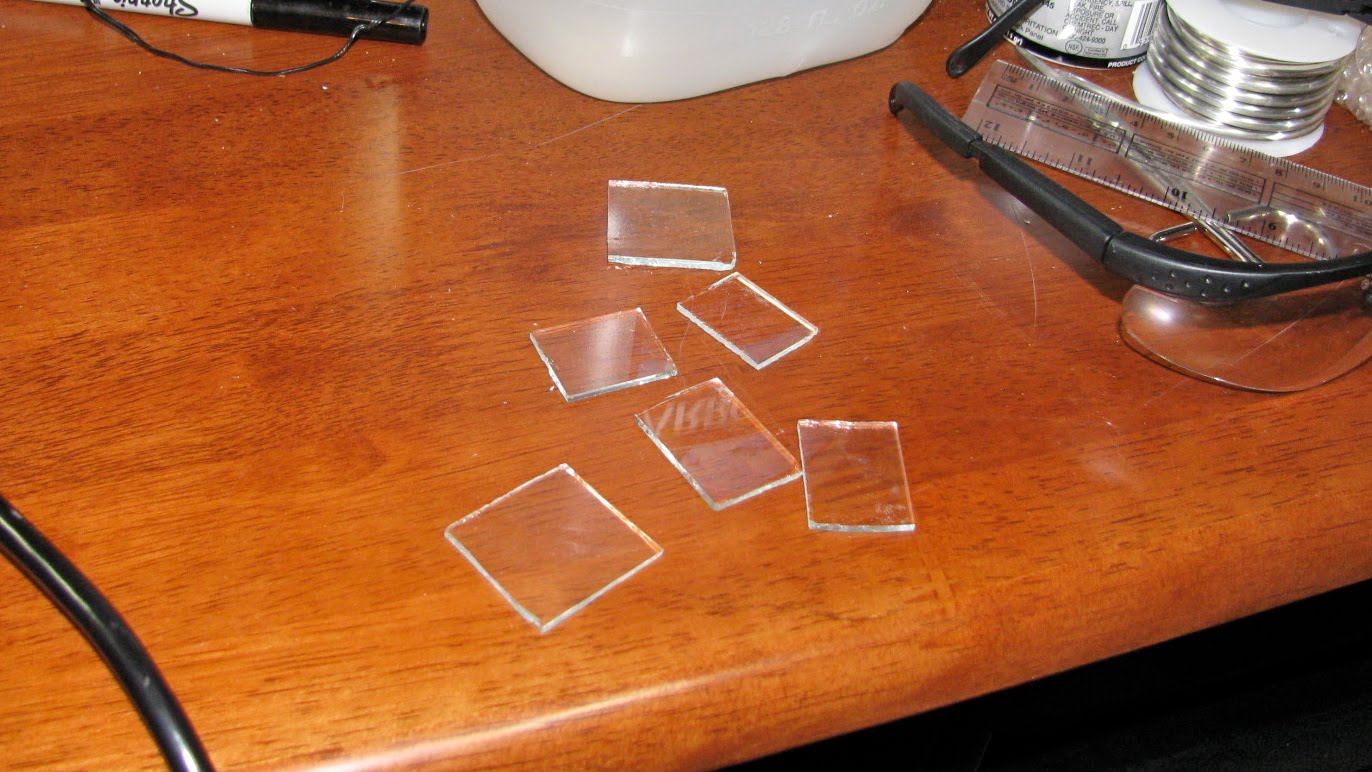
I've gone through so much glass trying to learn how to cut, it's insane. I have a huge pile of shards, and just one remaining piece that is about 5" by 5". I need to go get more somewhere.


Visit my shop at etsy.

Tuesday, November 17, 2009

Success!

Yay! So I was finally able to get some nice cuts in my glass. And thank goodness for the glass grinder, that thing saved me about three days worth of sanding glass by hand.


I'm pretty much just cutting the glass as close to size as I can get while leaving room for error, and then grinding them the rest of the way down.


And I really need to either get a temp control for my soldering iron, or a new one all together, cause I'm melting through my bits at an alarming rate. But at least I managed to get one piece done. It's pretty rough, and I'm probably gonna go back and touch up the solder, but it's nice to have at least one 'done'.


And it turned out really cute. A little eastern stink bug with some watch gears and paper. Small and cute and shiny.

Visit my shop at etsy.

Monday, November 16, 2009

Butchering Glass

Eek. So it seems my glass cutting is going to take a lot of practice. I've looked at an array of online glass cutting how to sites. I've got my supper nifty glass cutting oil. My ever handing glass snapping pliers. My apparently bottom of the rung glass cutter. And lots of lovely curved shards of glass. Not a straight line to be found amongst them. Not even one. Oh this is disappointing.


I've always had a problem of giving up on things if I'm not good at them right away. There's plenty of things I know how to do and know how to do well, so I've never had the patience to stick with something if I can't do it great right off the bat. And that's a pretty lousy way to be. Okay, gotta go get back on that horse.

Visit my shop at etsy.

Saturday, November 14, 2009

Filling my etsy shop

Spent the morning trudging through the process of stocking my etsy shop. It wouldn't be so bad, but out here in the sticks no one provides good internet access. So what should take about a minute or two to upload images to the store is taking about twenty five to thirty for each ornament. Egad that's dreadful. Oh well, it's all worth it.
I've had a few people stop by that saw my things at the auction, which is nice. It's good to know that people who have seen them in real life liked them enough to come check out my at the moment meager stock.
I'll be picking up a stamp pad today. I'd like to be able to deck out my shipping boxes a bit. It's nice to get something in the mail that is more interesting than a plain brown box. And I have managed to amass a nice array of stamps, yet no stamp pads. I've never actually had the need to ink them up, I just press them into clay. It will be strange to actually use them for their intended purpose.
My glass grinder is still sitting in it's box. I'm being a good girl and focusing on getting my ornaments on etsy before I delve back into glass, but oh the temptation is horrible.
I have been taking breaks though to search the internet for interesting fonts. $2000 for a new computer, and it didn't come with an Olde English font. Go figure. I've found some dandies though. And I've rummaged around for some old poems, and sent them through an online english to german translator. Print those out with my lovely new fonts, and I should have some very delectable papers to cover my boxes in.
I would love to find an old book of sheet music. Have to keep my eye out for that.

Visit my shop at etsy.

Thursday, November 12, 2009

Pleeeeeeease stop moving...

Oh the joy of photographing dangling objects.

I really wanted to shoot my ornaments outside, hanging from a nice mossy tree branch, but it's either been too rainy or too windy as of late. So I was relegated to the inside.

I first tried to make a little back drop and stage out of a card board box. I crumpled up some old book pages, and gave them an antiquing wash of paint and mica powders, and covered the sides of the boxes in them.


The result, way too busy. I think I may be able to salvage it for something else. Give it a few aging washes to tone it down and make it more subtle. But for now, not an option. In the end, I resorted to hanging a piece of ribbon from one of my tall floor lamps.

Then came the fun of trying to get ribbon suspended objects to stop moving. All they wanted to do was twist, and spin, and wobble. Every little draft sent them dancing. Each time the cat would walk by, it would send shivers through the little glass orbs.


It was quite the exercise in patience. And when they finally came to a stop, it would always be with the same side towards the camera. No matter how I would turn them, or rig the ribbon at a different orientation to the camera, whenever they came to rest from my touching them, the same side would be to the camera.


After much struggling, grumbling, and shutting of cats into the bedroom, I was able to get four sides of almost all of them. Some refused to exhibit but two of their lovely angles, and in frustration I was forced to put them aside for a later photo shoot. Some models can never be reasoned with.


So, I've come away with decent shots for most of them, I think I've got a little over half of them photographed. They should be going up on etsy today.


Visit my shop at etsy.

Sunday, November 1, 2009

Cutting Corners, Are We?

So I've got this thing coming up. A fundraiser that I'm going to have some pieces up for auction. Problem is, I have neither the time nor money for new business cards. I have this huge box of cards from about fifteen years ago, with completely outdated info. So what do we do? We get creative.


Print out some new info tags, a little x-acto work, edge with water color, glue down, and presto, new workable business cards. Ugh. I feel dirty. I hate doing something so substandard, but I don't really know what else to do for it at the moment. It'll have to do.

Visit my shop at etsy.

Saturday, October 31, 2009

Happy Halloween


Ah, Halloween. One of those wonderful pagan holidays, much like Easter and Christmas. Always fun. My fiance, father and I carved pumpkins last week. I haven't done that in years, I'm sorry to say. And there was a perfect Horror Movie moon out tonight. The sky has been thick with clouds for about a week now, but it opened up just enough tonight for me to snap some shots.


Visit my shop at etsy.

Friday, October 30, 2009

Watch Me Now

My mom found something wonderful. Little plastic watch face covers on Ebay. They're teeny tiny domed shells. And I've been dying to use them. They've been sitting on my table begging to be filled with treasures and magic. I think I've finally figured out what to do with them.

Recipe:
Several parts book pages, hand painted with water colors and mica powders
A healthy dash of watch guts, rinsed, dried, and shined
A pinch of micro no hole metal beads in gold, metallic pink and green
One or two tiny rhinestones

And there you have it. Lovely little baubles filled with tumbling shifting sparkly bits. They're scads of fun. And soon to be adorning the backs of my little glass boxes. I've only done six so far, and I think I have about twenty five left. Oh the possibilities.

Earlier today, I went outside and scraped the paper wasp nests out of the shed. Not very pleasant, but the rewards were well worth it. All the corners and crevices contained dilapidated webs and weathered silk cocoons of small alien creatures. It's funny that the empty homes of such small insects and arachnids can still make my skin crawl. I just know as soon as I reach over to shift some of the empty card board boxes out of the way, a brown recluse will scurry onto my hand. It's been pretty cold the past few days, so I was confident most of my sheds denizens would be slow and sleepy. My freezer now contains an innocent enough looking tupperware, inside of which are the honey combing constructs of paper wasps. Delicate works of art unto themselves, waiting to be added to a glass box that just needs that extra touch.